Thursday, May 27, 2010
Thursday, May 13, 2010
Tuesday, May 11, 2010
Monday, April 12, 2010
Tuesday, March 23, 2010
We learned of another technique to make our pictures more interesting to look at, the technique was contras. There are three different types of contrast that can be learned about. One is tonal contrast, another one is color contrast, and the final one is the contrast of sharpness. Contrast can be very fun and interesting to do!
Friday, March 19, 2010
Monday, March 15, 2010
Tuesday, March 9, 2010
In the class Media Production we have learned how to change different settings on the camera in order to make the pictures better. We learned how to use the ISO button. With this button we are able to either make the picture darker or lighter. Then we learned how to change the shutter speed. With this we were able to manipulate wether our picture had blur or not. Then finally we learned how to change the aprature. Changing the aprature can determine how sharp things look in your picture.
The first two set of pictures were taken at the same place, with the same enviornment around them. The reason one looks lighter and the other one looks darker is because I changed some of the setting from the ISO button. The first picture was taken at ISO 1600 which made it really bright. The darker picture was taken at ISO 100 which made it seem darker than what it really was. This is what you can do with the ISO button so you can either decide if you want you picture dark or light.
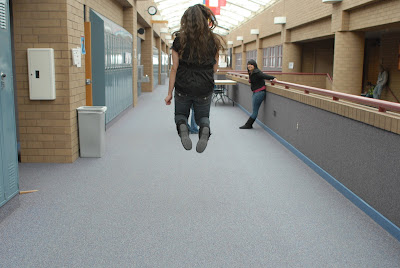
The second set of pictures are examples of the different shutter speeds. If you want to take a picture of high speed moving object it is better if your shutter speed is fast. Like 1/50 of a second. Unlike though if you are taking a picture of just an object that is still then it wouldn't matter if the shutter speed was like 2 seconds. The first my pictures of examples of shutter speed I used a faster shutter speed so that it caught me in the air without there being any blur. The second of those pictures though has blur because the shutter speed was slow. These are both examples of how you can use shutter speed.
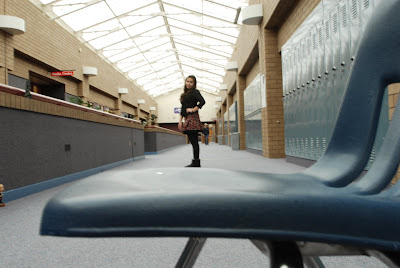
Finally the last set of pictures are examples of aprature. With aprature the smaller the number the bigger the hole, and the bigger the number the smaller the hole. With the different sizes of holes depends on how much light goes into the lense. The first picture is an example of aprature 8. In this picture the background is as defined as me. You can see the bricks one by one but you can also see me well too. The second of those pictures is with aprature of 1.8. In this picture I am defined but not the background. You can see how the aprature changes can make your pictures different.
In conclusion, I showed you how different setting on the camera can make your pictures come out differently. I explained how the ISO button works if either you want your picture darker of lighter than what your environment is. Then how the shutter speed can make you stop in mid motion. Blur can be good or bad in pictures you just have to know when it's the right time. Then finally I talked about the aprature. With the aprature your pictures can come out to be very fun, but like all the other settings, you have to know when the time is right! So next time you grab a camera make sure you play around a little with the settings!
Friday, March 5, 2010
Monday, March 1, 2010
Thursday, February 25, 2010
Tuesday, February 23, 2010
Friday, February 19, 2010
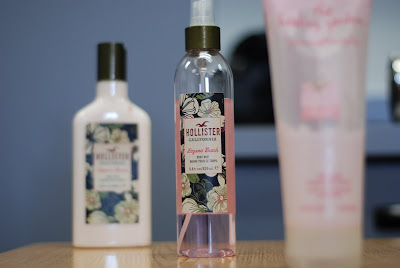
On this project i learned that on AUTO FOCUS the camera atomaticlly focuses when the shutter realse button is halfway. To take the three fotos i used the focus selection and used the multi-selector to select the focus are. My partners were Amber and Nicole. We used three different containers and set them slightly behind eachother. After that we just focused on each bottle and used the multi selector.
Wednesday, February 17, 2010
Thursday, February 4, 2010
Thursday, January 21, 2010
Subscribe to:
Posts (Atom)


